how exactly to use your Ascensia Contour®Next One Blood Glucose Meter. If you are using a different device, instructions for use may be different so please ensure you refer to the instruction manual that came with your BGM.
Watch this step-by-step video on how to use your BGM, or read on for step-by-step instructions.

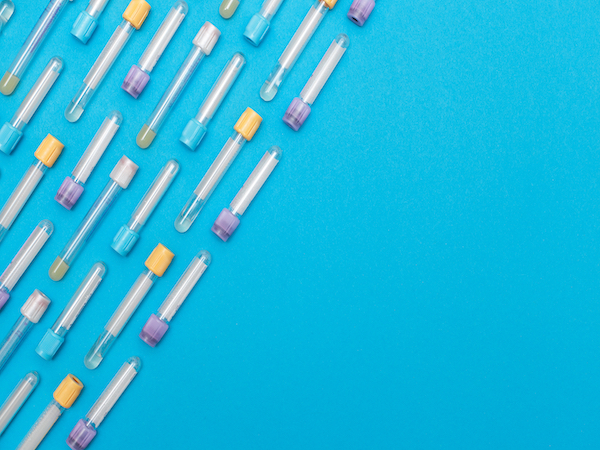
Lancing device and lancet
Step 1: Wash your hands
- Wash your hands with soap and warm water
- Rinse and dry well.
Step 2: Prepare the lancet
- Use a new lancet for each test so that the needle is sharp and sterile.
- Twist and unlock the endcap of the lancing device — line up the white raised mark and black indented mark.
- Loosen the round protective cap on the lancet but do not remove it.
- Rotate ¼ turn before inserting the lancet firmly into the lancing device. Push until the lancet comes to a complete stop.
- Carefully twist off the round protective cap. Save the cap for disposing of the used lancet.
- Re-attach the lancing device endcap. ‘Click’ to lock.
NOTE: Always dispose of used test strips and lancets in the medical waste or as advised by your healthcare practitioner.
Step 3: Insert the strip
- Hold the test strip with the grey square end facing toward the meter.
- Insert the grey square end firmly into the test strip port until the meter beeps. This will turn the BGM on.
NOTE: After you insert the test strip, apply blood to the test strip within 3 minutes or the meter turns off. If the meter turns off because no blood was applied to the strip, remove the test strip and reinsert it to begin a test.
Step 3: Collect blood
- Adjust the depth of the lance by twisting the dial. The shallowest is “1” and the deepest is “5”.
- Choose a puncture site from a fleshy area on the palm of your hand.
Step 4: Apply blood to test strip
- The screen displays the blinking blood drop indicating it’s ready to test a blood drop.
- Immediately touch the tip of the test strip to the drop of blood. The blood is drawn into the test strip through the strip.
- Hold the tip of the test trip in the blood drop until the meter beeps.
When more blood is needed
- If the meter beeps twice and the screen displays a blinking blood drop with a plus sign, the test strip does not have enough blood.
- Apply more blood to the same test strip within 60 seconds.
Step 5: Results
- After a 5 second countdown, the meter will display your blood glucose result.
- It’s suggested to record your blood sugar readings either on the Contour®Diabetes app (here is a list of compatible devices) or another method (such as in a notebook), and provide these results to your healthcare practitioner at your next check-in. Your blood sugar readings are helpful in guiding your treatment plan.
Blood Sugar Targets
A blood sugar target is the range you try to reach as much as possible. Targets vary from person to person so make sure you talk to your healthcare practitioner about which target range is best for you.
The table below shows what typical blood sugar targets look like.
| Fasting blood sugar or blood sugar before meals (mmol/L) | Blood sugar two hours after eating (mmol/L) | |
|---|---|---|
| Target for most people with diabetes | 4.0–7.0 | 5.0–10.0 |
How Often Should I be Testing My Blood Sugar?
The main purpose of testing your blood sugar would be to understand how certain foods, or other lifestyle factors, affect your blood sugars. Take this quiz by Diabetes Canada to get a recommendation on how often you should test your blood sugar levels.
When is the Best Time to Check My Blood Sugar Levels?
Typical times to check your blood sugar are:
- When you first wake up, before you eat or drink anything (this is your fasted blood sugar level)
- Before a meal
- Two hours after a meal
- At bedtime
It’s best to chat with your healthcare practitioner about when the best times are for you to check your blood sugar levels.
Insurance Coverage for Blood Glucose Meters
Your insurance coverage for strips and lancets can vary depending on your individual or provincial plan — generally only 200 strips may be covered per year. Please ensure that you check your coverage with your insurance provider or provincial plan.
Coverage in Ontario
The Ontario Drug Benefit Program covers some products used to monitor and test for diabetes. The table below summarises the number of test strips covered depending on the type of treatment you receive.
| Patients managing diabetes | Maximum number of strips (per year) covered |
|---|---|
| With insulin | 3000 |
| Using medication with higher risk of causing hypoglycemia (low blood sugar) | 400 |
| Using medication with lower risk of causing hypoglycemia (low blood sugar) | 200 |
| Through diet/lifestyle therapy only (no insulin or medications used) | 200 |
To learn more about what is covered by the Ontario Drug Benefit Program here.
Coverage in British Columbia
In British Columbia, you will need to complete a blood glucose monitoring training at a diabetes education centre (DEC) or a primary care network (PCN) in order to be covered for test strips. Depending on the type of treatment that has been dispensed in the last 180 days, the number of test strips covered by BC PharmaCare can vary (see table below).
| Treatment category | Number of test strips covered per year |
|---|---|
| With insulin and without the use of a continuous glucose monitor (CGM) nor a flash glucose monitor (FGM) | 3000 |
| With insulin and with the use of a CGM or FGM | 200 |
| Using medications with a higher risk of causing hypoglycemia (low blood sugar) | 400 |
| Using medications with a lower risk of causing hypoglycemia (low blood sugar) | 200 |
| Through lifestyle | 200 |
Learn more about BC PharmaCare’s test strip coverage here. Lancets are not covered by BC PharmaCare.